DIY lippan art has quietly moved from village walls to modern homes, art studios, children’s workshops, and even contemporary interior projects. What once started as a folk tradition using mud and mirrors is now something many people want to try with their own hands. If you’ve searched for diy lippan art, chances are you’re curious, inspired by images, and wondering whether you can actually make it yourself.
Here, you’ll understand what diy lippan art really involves, how beginner easy lippan art differs from professional work, how to think about lippan art scale, and when it makes sense to learn deeper through lippan art workshops. Along the way, you’ll also see why learning from the best lippan artist changes everything.
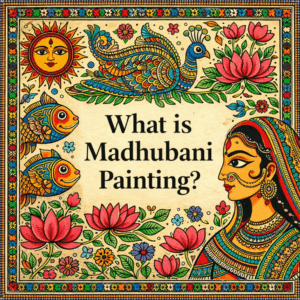
What Is DIY Lippan Art and Why So Many People Are Trying It?
DIY lippan art is the process of creating traditional mud mirror artwork using accessible materials, simplified techniques, and manageable surfaces. Unlike large wall murals done by trained artisans, this usually starts on boards, panels, or small wall sections.
People are drawn to diy art for a few reasons:
• It feels tactile and grounding
• It doesn’t require prior art training
• The materials are natural and forgiving
• The results look far more premium than the effort suggests
Unlike painting, lippan art doesn’t depend on color mastery. It depends on rhythm, repetition, and patience, which is why beginner easy lippan art is genuinely possible for first-timers.
Beginner Easy Lippan Art: Where First-Timers Should Start?

Beginner easy lippan art is not about perfection. It’s about understanding form.
If you’re starting out, diy art should begin with:
• Flat boards instead of walls
• Simple circular or geometric motifs
• Limited mirror usage
• One consistent design pattern
This approach removes fear and builds confidence. Many people fail at diy lippan art because they jump into complex peacock or floral patterns too early.
A beginner easy lippan art setup allows you to focus on:
• Mud consistency
• Mirror placement
• Hand pressure and line thickness
Once these are comfortable, everything else becomes easier.
How to Make Lippan Art at Home Step by Step?

This is the section most users are looking for when they search how to make lippan art.
Here’s a practical breakdown.
Step 1: Preparing the Base
Choose a wooden board, MDF panel, or thick canvas board. Clean it thoroughly. If needed, apply a base coat and let it dry fully.
Step 2: Mixing the Mud
For diy lippan art, the clay should be smooth but firm. Too wet and it collapses. Too dry and it cracks. This balance is something most people refine with practice or guided learning.
Step 3: Planning the Design
Lightly sketch the design with chalk or pencil. Beginner easy lippan art works best with symmetry.
Step 4: Applying the Clay
Using fingers or a cone, build raised outlines. This is where diy art becomes meditative.
Step 5: Adding Mirrors
Mirrors are pressed gently into the clay while it’s still wet. Spacing matters more than quantity.
Step 6: Drying and Finishing
Allow natural drying. Avoid fans or sunlight. Once dry, seal if required.
This process explains how to make lippan art mechanically, but artistry develops with repetition and feedback.
Understanding Lippan Art Scale Before You Start

Lippan art scale is one of the most misunderstood aspects of diy lippan art.
Scale refers to the size and complexity of the artwork relative to the space it occupies. Small panels behave very differently from wall-sized installations.
For diy lippan art beginners:
• Small lippan art scale panels (1–2 feet) are ideal
• Larger scale requires structural planning
• Mirror density increases with scale
• Drying time changes dramatically
Understanding lippan art scale early prevents cracking, warping, and disappointment. This is also where many learners realise why professionals train extensively before handling large commissions.
DIY Lippan Art for Kids: Creative, Safe, and Skill-Building

Lippan art for kids is gaining popularity because it combines creativity with tactile learning.
However, diy art for kids must be adapted:
• Use non-sharp mirrors or reflective discs
• Pre-mixed clay for consistency
• Smaller designs with fewer details
• Adult supervision during drying stages
Lippan art for kids improves:
• Fine motor skills
• Pattern recognition
• Cultural awareness
• Focus and patience
Many parents start with diy lippan art for kids at home and later move to structured learning environments when interest deepens.
Why DIY Lippan Art Has Limitations (And That’s Okay)?
DIY lippan art is empowering, but it has limits.
Common challenges include:
• Inconsistent clay texture
• Cracking after drying
• Mirror misalignment
• Design imbalance
This doesn’t mean diy lippan art isn’t worth doing. It means growth eventually requires guidance.
Most people who start with diy lippan art reach a stage where they want refinement, cleaner finishes, and confidence with lippan art scale. That’s usually when structured learning or lippan art workshops come into the picture.
Best Lippan Art Classes | In-Studio or Online Live or Recorded
Lippan Art Workshops: When DIY Turns Into Skill

Lippan art workshops exist for a reason. They bridge the gap between experimenting at home and creating professional-quality work.
In guided lippan art workshops, learners understand:
• Proper material ratios
• Long-term durability techniques
• Advanced symmetry planning
• Professional mirror placement
Many artists who are now considered a best lippan artist began with diy lippan art before training under experienced mentors.
If you’re enjoying diy lippan art but want cleaner results, structured lippan art workshops can help you move faster and avoid common mistakes.
Learning from a Best Lippan Artist vs Learning Alone

The phrase best lippan artist often appears in searches because people want trust.
Learning diy lippan art alone teaches experimentation. Learning under a best lippan artist teaches clarity.
The difference shows in:
• Finishing quality
• Design balance
• Longevity of the artwork
• Confidence with larger lippan art scale
Subtle exposure to professional processes, even through recorded or studio sessions, often transforms how learners approach diy lippan art entirely.
This is where studios like Rajni Dutta Art & Design quietly become reference points for learners exploring both tradition and contemporary applications.
DIY Lippan Art vs Custom Lippan Art Installations
Not everything needs to be DIY.
DIY lippan art is ideal for:
• Learning
• Small decor pieces
• Creative exploration
Custom installations are better for:
• Feature walls
• Commercial spaces
• Permanent decor
• Large lippan art scale projects
Many learners who start with diy lippan art eventually commission professional work for their homes or events, using their own experience to appreciate the craftsmanship involved.
If you love the process of diy lippan art but want a statement piece created professionally, custom lippan artwork offers scale, durability, and design depth.
How DIY Lippan Art Builds Respect for the Craft
One unexpected outcome of diy lippan art is respect.
Once you’ve mixed clay, waited for drying, corrected cracks, and adjusted mirrors, you understand why trained artists charge what they do, and why the title best lippan artist is earned over years, not weeks.
DIY lippan art doesn’t replace tradition. It reconnects people to it.
Final Thoughts: Start with DIY, Grow with the Right Guidance
DIY lippan art is a beautiful entry point into a centuries-old craft. It invites curiosity, patience, and creativity. Whether you’re exploring beginner easy lippan art, introducing lippan art for kids, or slowly understanding lippan art scale, every step adds appreciation.
For many, this journey naturally evolves, from diy experiments to lippan art workshops, from small panels to custom installations, and from curiosity to collaboration with experienced studios.
That’s when names like Rajni Dutta Art & Design quietly surface, not through force, but through credibility built around learning, craftsmanship, and respect for the art form.
Learn diy lippan art, workshops & custom installations